Это руководство разработано, чтобы помочь вам с вашим первоначальным опытом использования оборудования.
Раздел "Настройка Moko MKGW1 гейтвэй" объясняет, как подключиться к гейтвэю с помощью телефона или ПК, а затем получить доступ к веб-платформе управления. На платформе вам нужно будет настроить параметры, чтобы гейтвэй мог подключиться к серверам Navigine.
Раздел "Настройка Location " сосредоточен на использовании платформы Navigine. Он предоставляет пошаговые инструкции по важным задачам, таким как загрузка вашей карты, добавление тегов и убеждение в том, что все работает правильно. Каждый из этих шагов повышает точность отслеживания меток и позволяет выявить любые проблемы.
Если вы обнаружите, что что-то пропустили, вернитесь и просмотрите предыдущие шаги, прежде чем продолжить. Перед установкой шлюзов обязательно запишите всю информацию об устройстве, такую как MAC-адрес. Эта информация понадобится позже при добавлении ее на карту.
¶ Настройка Moko MKGW1 гейтвэй
¶ Шаг 1. Включить гейтвэй
Включите Moko MKGW1 гейтвэй и подождите 1 минуту.
¶ Шаг 2. Подключите гейтвэй к точке доступа Wi-Fi
Используя свой компьютер или телефон, подключитесь к точке доступа Wi-Fi со следующими настройками по умолчанию:
-SSID: MKGW-BW-xxxx, где xxxx - последние два байта MAC-адреса гейтвэя (например, MKGW-BW-909C).
-Пароль: Moko4321
![]()
¶ Шаг 3. Доступ к веб-платформе управления
После подключения к точке доступа Wi-Fi, получите доступ к веб-платформе управления через IP-адрес 192.168.22.1 интерфейса локальной сети шлюза.
![]()
¶ Шаг 4. Вход в систему
Войдите в веб-платформу управления, используя следующие учетные данные по умолчанию:
Имя пользователя: Admin
Пароль: admin
¶ Step 5. Выберите тип подключения (Ethernet или Wi-Fi)
Выберите либо Ethernet, либо Wi-Fi соединение для Moko MKGW1 гейтвэя.
![]()
![]()
¶ Шаг 6. Настройка отправки данных с гейтвэя
- Перейдите в раздел "Function – Server Access".
- Установите протокол MQTT, интервал загрузки на 1 секунду.
- Введите следующий адрес сервера:
- Upload interval 1
- Fill the Host/IP with rtls.navigine.com
- Port 1883
- Заполните поля Имя пользователя и Пароль следующим образом:
Username: navigine-mqtt
Password: htkEQqX$Mc - Gateway Publish Topic gw/moko/MACADDRESS/status
- Gateway Subscribe Topic gw/moko/MACADDRESS/response
- Gateway Manage Publish Topic gw/moko/MACADDRESS/action
- Gateway Manage Subscribe Topic gw/moko/MACADDRESS/response
![]()
- Select the BLE scan options as follow on image:
![]()
- Apply the changes.
¶ Step 7. Configure Beacons for Asset Tracking
For best results in asset tracking, set the advertising time in beacons to 100ms.
If you are using other beacons, set the TX Power to 3 or -12 dBm.
![]()
¶ Location setup
¶ Step 1. Log in to Navigine account
Please sign in to your account.
¶ Step 2. Upload floor plan
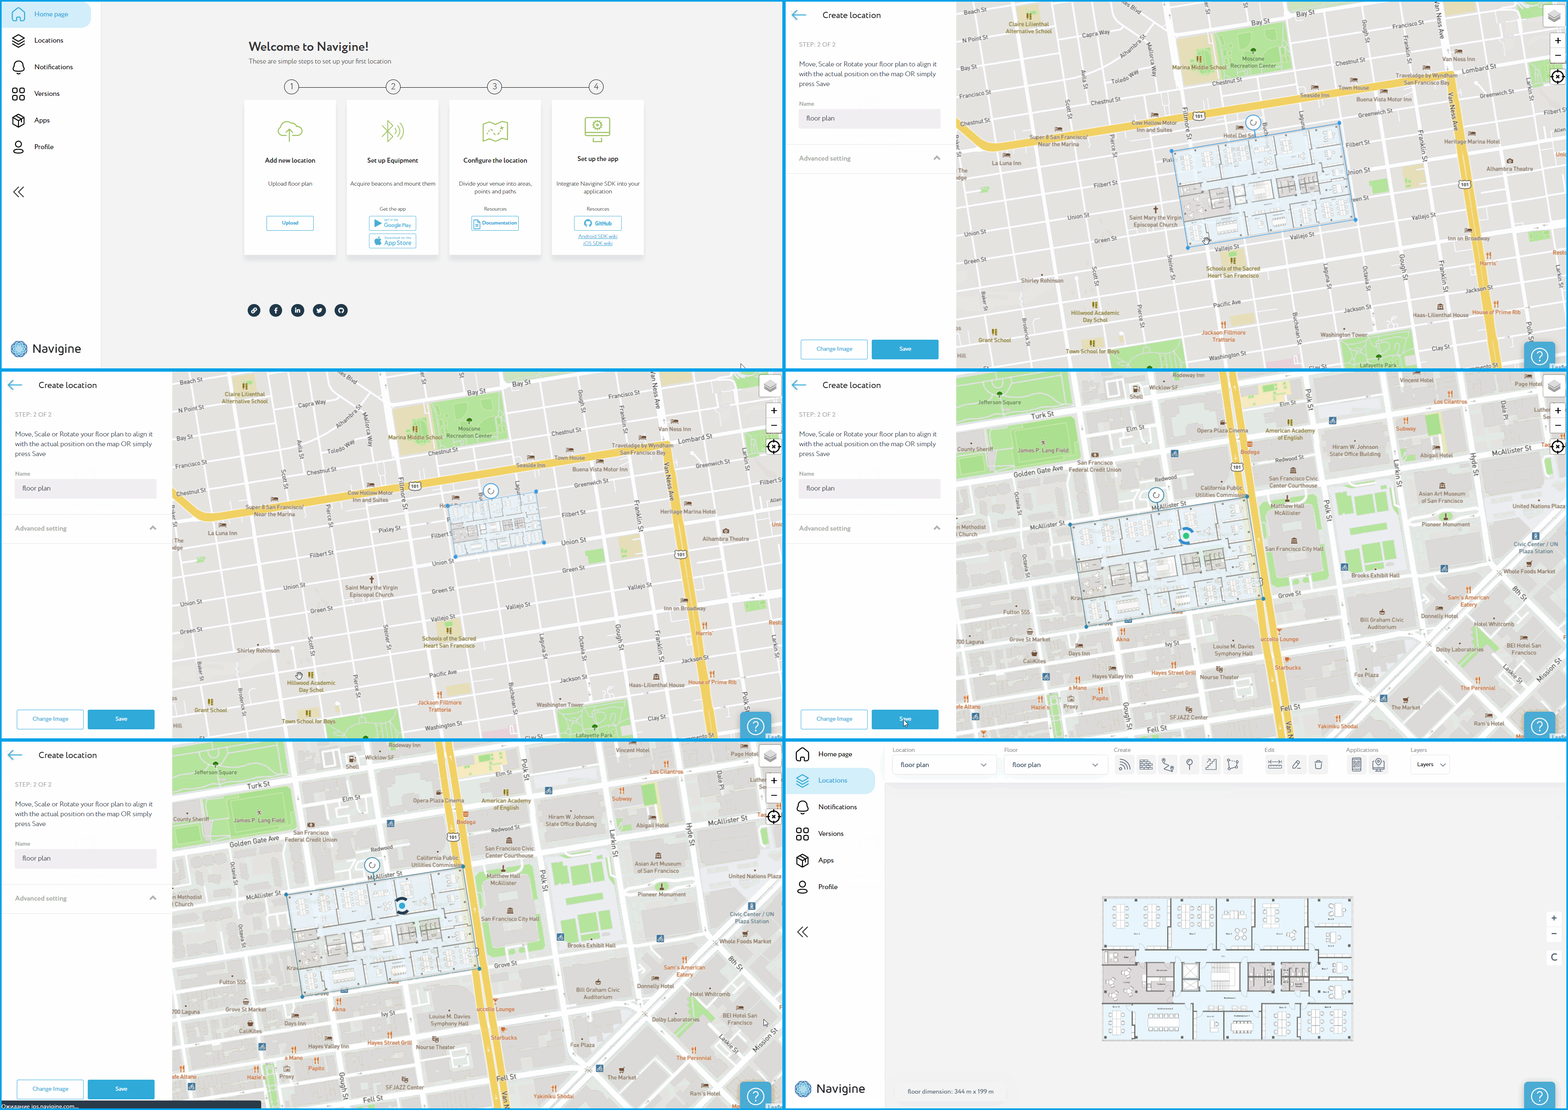
The first step in setting up a location-based tracking system is to upload an image of the floor plan. This will serve as the basis for all subsequent steps, including adding locators, drawing barriers, and creating zones. To access a more detailed manual, visit the link.
¶ Step 3. Add gateways to the map
-
Open the Sublocation interface.
-
Click on the "Add transmitter" button.
![]()
- Enter the name and UUID of the Moko Plug gateway.
-
Name: Choose a descriptive name for the gateway. For example, "Moko Plug gateway 1" or MAC address.
-
UUID: Enter the MAC address of the Moko Plug gateway without the colon " : " symbol.
![]()
-
Click on "Save" button to add the Moko Plug gateway to the floor plan.
-
Repeat the process for each additional Moko Plug gateway that you want to add to the floor plan.
¶ Step 4. Draw barriers above walls and outdoor area
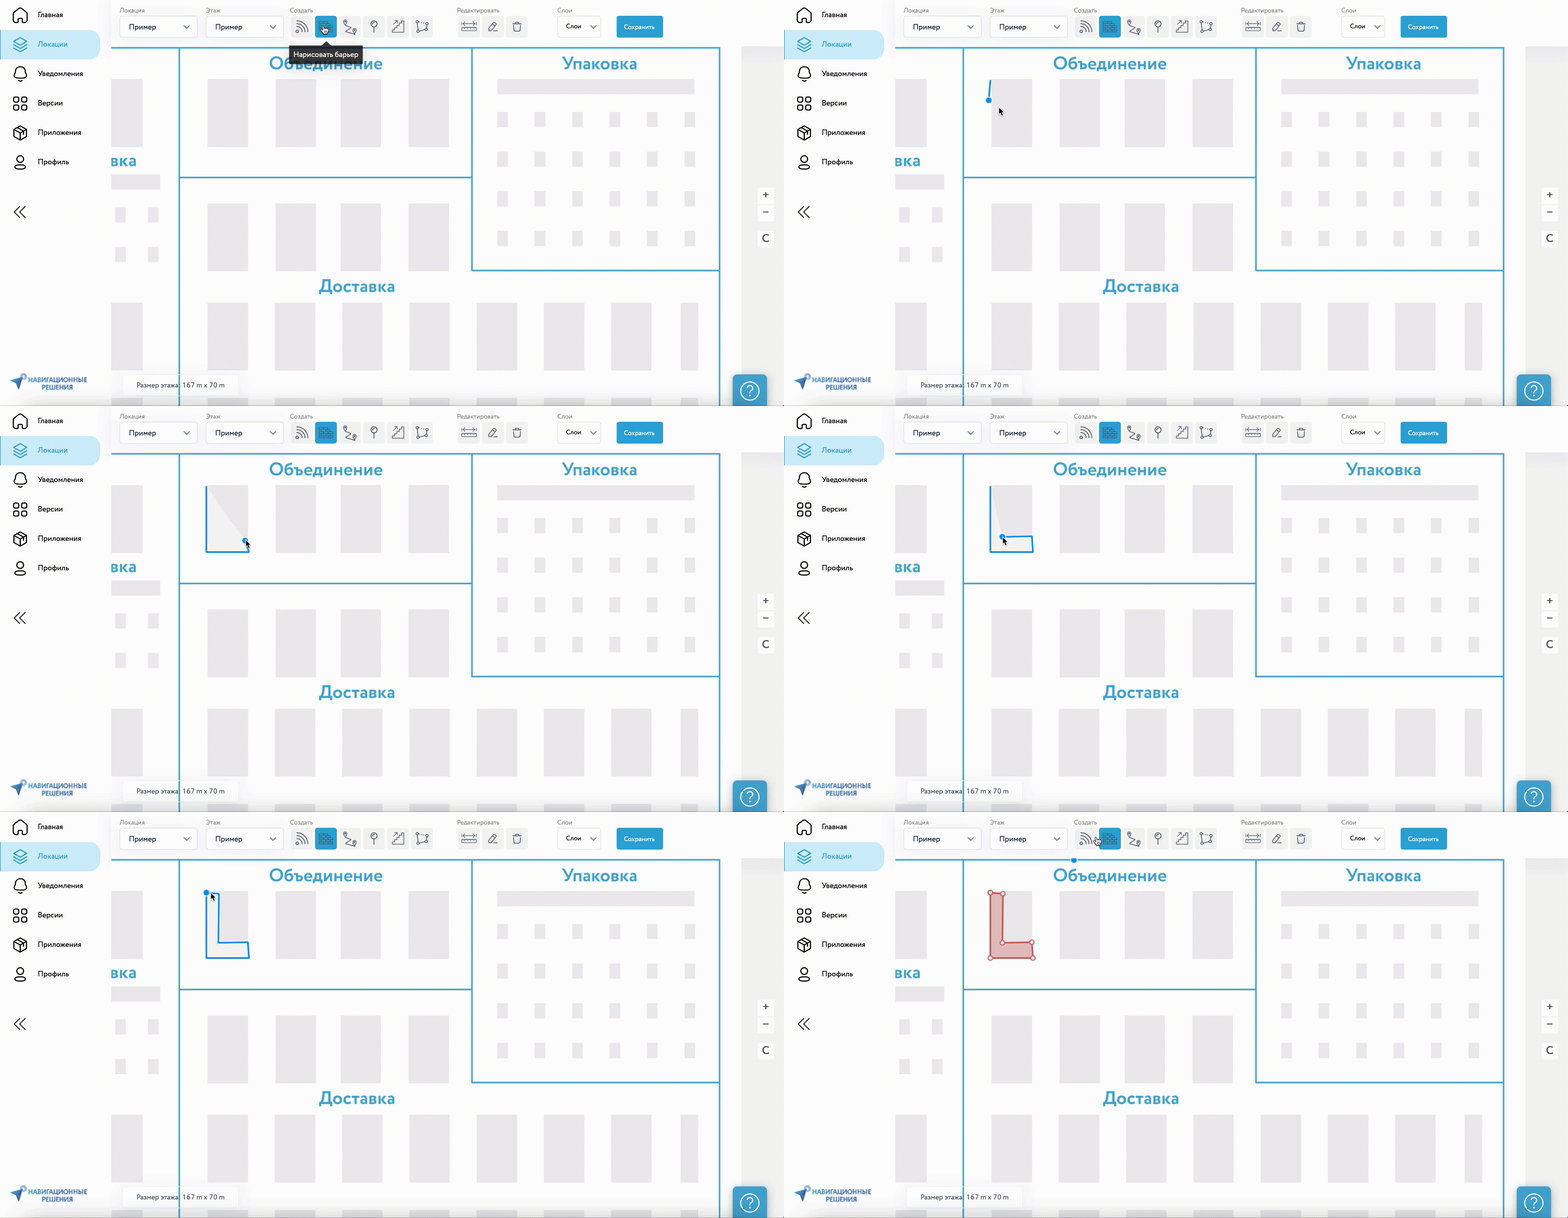
After uploading the floor plan, the next step is to draw barriers on closed locations and walls. Barriers define areas of the floor plan that are off-limits to navigation and will help to ensure that the navigation system accurately reflects the layout of the building. To access a more detailed manual, visit the link
![]()
¶ Step 5. Enable RTLS platform
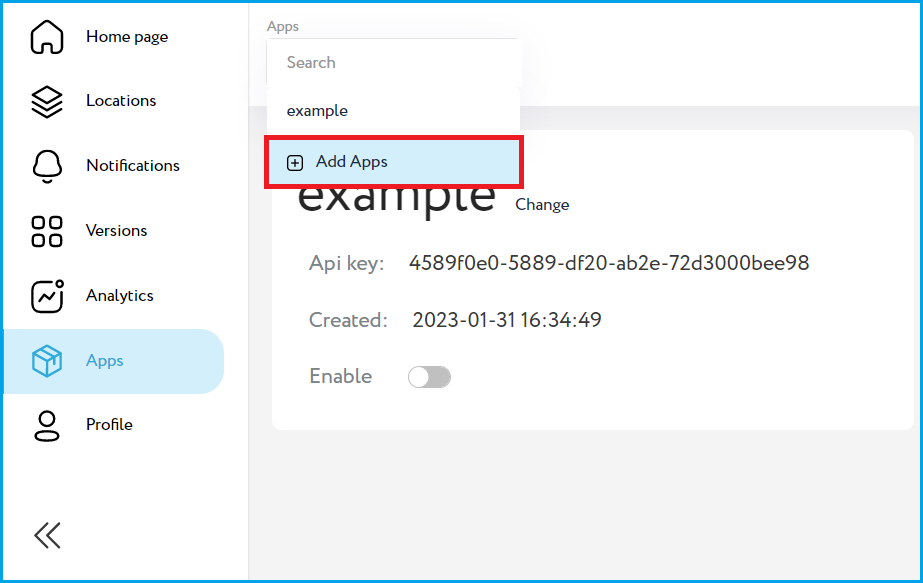
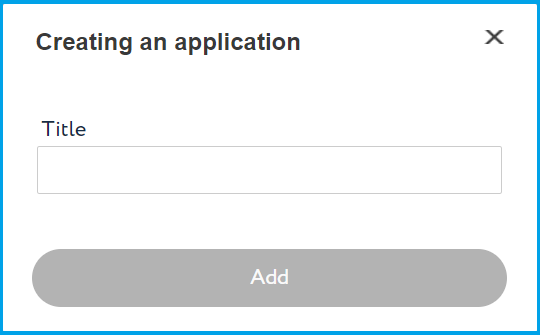
- Select "Apps" and then "Add Application" from the left menu.
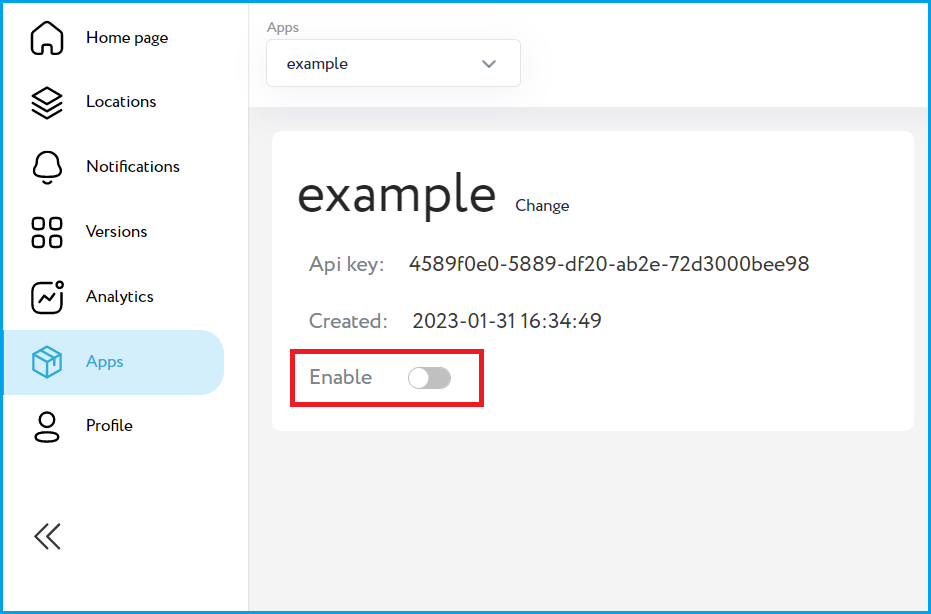
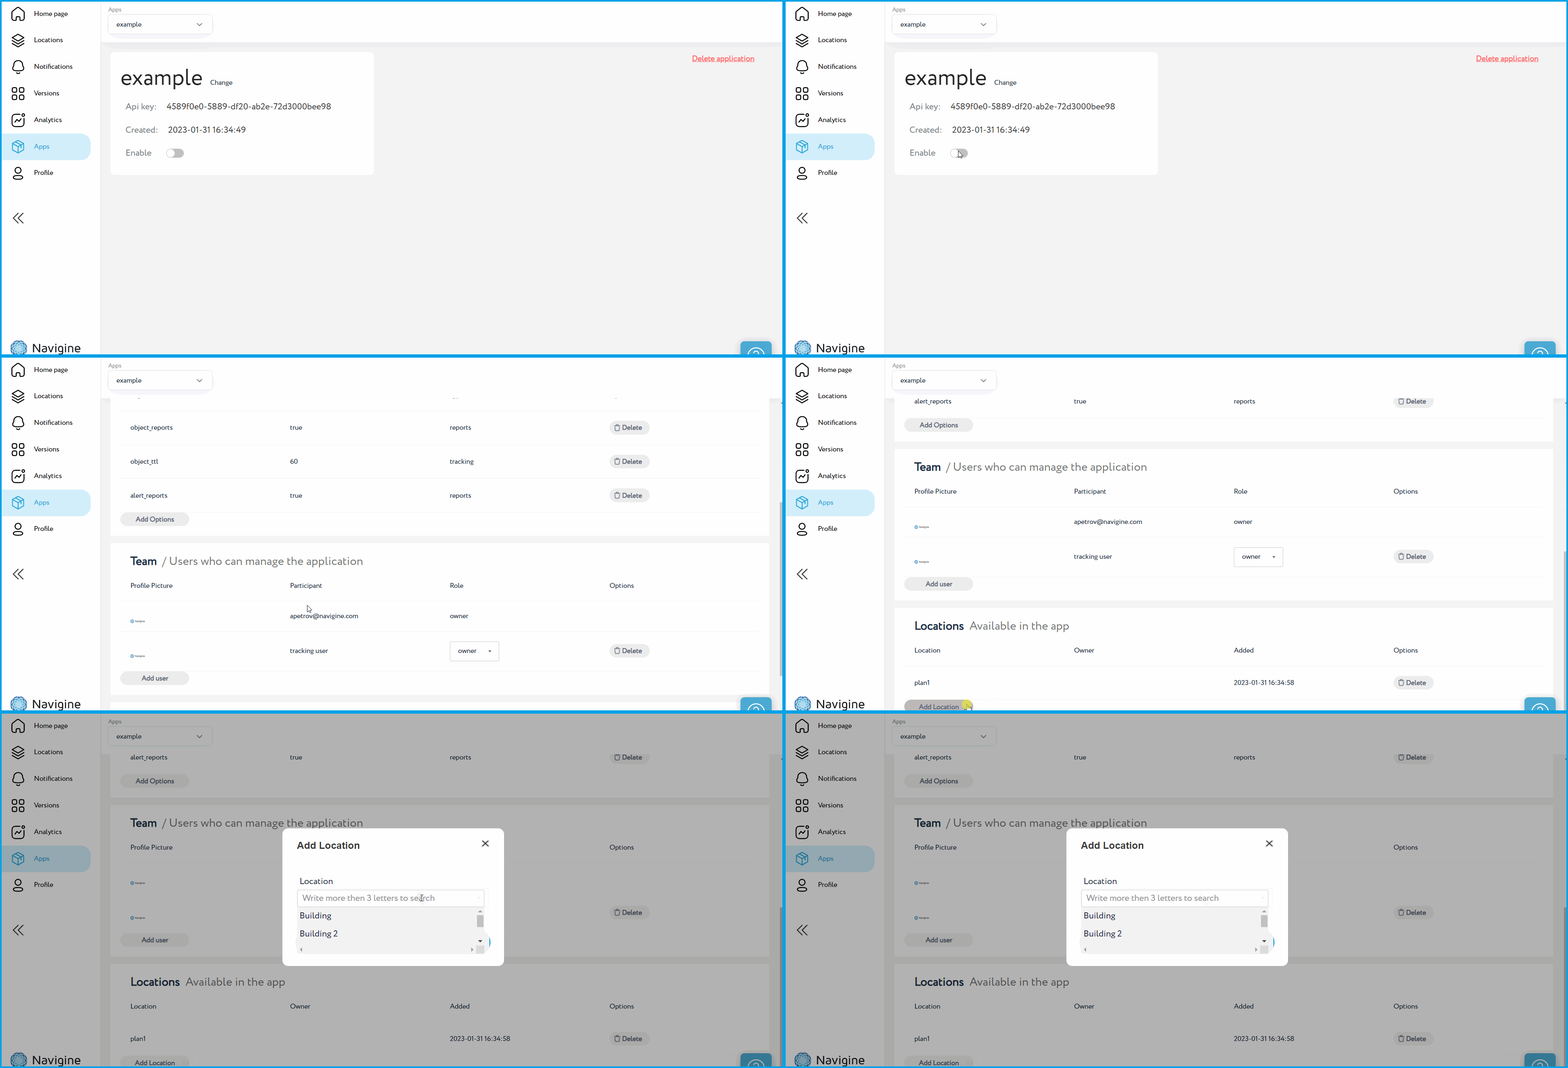
Options - which allow you to customize the app settings
Team - which determines the users who can manage the application
Locations - which specifies the locations that will be visible for tracking
- Scroll down to the "Locations" section and add the necessary locations.
¶ Step 7. Add asset tags
You need to add objects to the system to view your assets on the online tracking platform. The steps for adding objects are as follows:
![]()
- Click on "Create Objects". A "Create Object" window will pop up.
![]()
- In the window, fill in the following information:
-
Title - the name that will be displayed in the Online tracking tab
-
Group- the group that will contain the asset tag
-
Object type – select "Dynamic" for asset tags that move, or "Static" for those that don't
-
Device type – select "New" if you're adding a new device, or "Old" if you've already added the device. If you select "Old", a list of device names will appear in the Device ID section
-
Device ID – the IMEI of the device or Mac adress
If everything is filled in correctly, the tracked devices should appear in the Online tracking tab within a few minutes.
¶ Step 8. Go to online tracking tab
Check the Online tracking tab to see the objects appear if everything is correct.
![]()